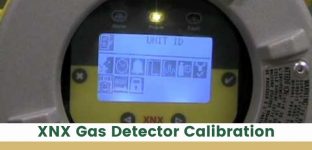
XNX Gas Detector Calibration details discussion. So I’ve just installed this ammonium gas detector transmitter and we’re standing here with a big ammonium tank. We got the level here inside, of course, NH three. So I thought I’ll show you some features of it if you’re considering getting one. It’s a Honeywell X and X right now. I’ll show you the light. Turn on the light so you can see that it’s zero Ppm and it’s measuring NH three. To reset the fault alarm. There are no alarms, I guess. Well, you can see you have two levels here the first level and the second XNX Gas Detector Calibration.
I believe the second level is when the alarm goes off, I connected it to the relay. You can also use a four to 20 milliamps signal out to the Plc, but this is just using an off switch. That is when you get over the second level. I believe in Ppm of NH three. Then the alarm goes off and then you have to retract back to number one. When number one is accomplished, when you’re down below one, then it’s possible to reset it here. Otherwise, if you don’t reset it here on the local place on the local here, then it’s still available in the control system to the operators.
Table of Contents
Gas detector price in Bangladesh
In Bangladesh, the importance of gas detectors has grown significantly due to the increasing awareness of safety in both residential and industrial sectors. Gas detectors are crucial for detecting hazardous gases like LPG, natural gas, and carbon monoxide, which can pose serious risks if left undetected. The Gas detector price in Bangladesh varies widely, depending on factors such as brand, sensitivity, type of gas detected, and additional features like digital displays or connectivity options. Generally, basic models suitable for home use start from around 1,000 BDT, while more sophisticated industrial-grade detectors can cost upwards of 10,000 BDT or more.
The market offers a range of options from local manufacturers to international brands, each catering to different needs and budgets. It’s essential for buyers to consider the reliability and accuracy of the device, as well as after-sales service and warranty, when making a purchase. With the rise in gas-related accidents in recent years, investing in a quality gas detector has become a necessity for ensuring safety in Bangladeshi homes and workplaces.
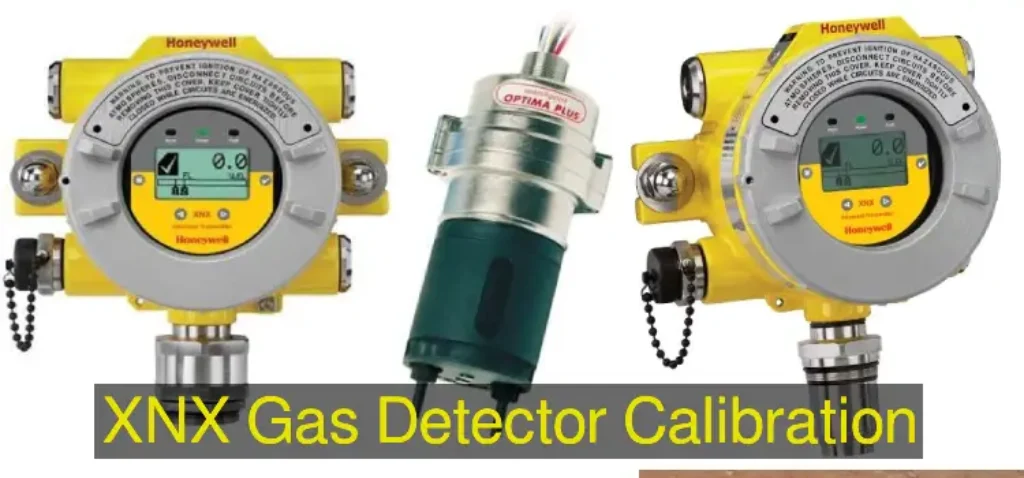
XNX Gas Detector Calibration Images

So you got the sensor here and you get a different intake here. You have four possible cable intakes and you can hopefully just unscrew this one. I’ll show you the inside. So this is the inside and you got the voltage. The supply runs on 24 volts plus and minus here. And then also I’m using guard sort of NNO. And so I connect 24 to the common. And then when a guard goes active, it closes the switch and activates the alarm in the control system. It’s just located far away.
Xnx gas detector calibration setting system
So that’s pretty much it about xnx gas detector calibration. This connection here for the T before is for the rest of the local reset button. And it’s pretty self-explanatory. You got the relays here and you got the four to 20 million. Here is the old signal here hard. You can’t press here. You have to have a sort of magnet. This is a magnet that comes with the package and the passcode has to read the manual. So you can also use Modbus. But here we’re using a relay. Since we don’t have an output for analog input control and navigation is pretty self-explanatory. XNX Gas Detector Calibration.
XNX gas detector calibration password
Regarding the password, it looks like it’s four zeros for both the routine maintenance and technician and password admin. It’s the same. So let’s see if we can get in four0 and enter calibrate configure. Let’s try that one-like language. I’m happy with the English set time and date. Why not? That’s okay, I’ll click cut next. Here we have limits. You can set them in ppm. 200 is Max and you got the levels for $1500. So what else have we got? Latching, non-latching set units, volume milliamps levels, gaps, calibration interval relay options.
It’s working, so I won’t change it. I will show you later. Okay, so that’s pretty much it looks like you can lock it. Also, configure security. I won’t go there. I don’t want to lock it. So let’s try it. And now we have a little bit of ammonia here. Let’s get it close, see if we get some reading, and nothing yet. But I will press here on the bottle and there we have it. So there we got the alarm. I was just getting some fuse up here.
So now we have an alarm in the control room that tells us that we have a leak here or something and I turn off, put back the lid here and it’s going down. So I’ll do a fast sequence of this. But when it comes down to 50, then it’s possible to push that button. So now we can reset it. But I thought I would show you how it looks on the screen inside the control room. So let’s go and check that out. The alarm shows you a picture of it in the operating system.
FAQ: XNX Gas Detector Calibration
How to perform gas calibration on the XNX?
- Access the programming menus to set XNX Gas Detector Calibration.
- Once in the menus select the Calibrate menu and press the (✓) key.
- Now simply mark the Gas Calibration key and press the (✓) key option.
- Apply zero gas; when the zero gas reading is stable press the (✓) key to confirm zero calibration.
- So the zero calibration is complete without error, then the transmitter device shows a Zero Passed screen.
- Now click the (✓) mark to perform Span Calibration, and choose (✖) to avoid Span Calibration. then go back to the menu.
- Enter the concentration of the span gas by using the (+) or (-) switches to increment or decrement the values. Click on the tick mark (✓) to accept the value and go to the next digit. Don’t stop until all are marked.
- It is time to go with span calibration gas; now wait for the right time for (✓) to confirm span calibration.
- If the span calibration is successful, the transmitter will display the Span Passed screen.
- So, you can be ready to promote the area “Exit with Inhibit Off”, “Exit with Inhibit On” or “Do not exit”.
Does Soft Reset on the XNX all look optima or Excel signal?
- Access the programming menus.
- When you marked CALIBRATE menu option than simply press the (✓) button.
- Scroll and select the SOFT RESET option.
- Press the (✓) key to confirm the reset.
- After completing the above option then Soft Reset press for the (✖) key exit option.
Performing a Soft Reset will restart the sensor. The boot-up cycle for the Optima or Excel sensor will take about 2 minutes. Hope you get an idea on XNX Gas Detector Calibration.
FAQ: XNX Gas Detector Calibration
Welcome to our FAQ section on XNX Gas Detector Calibration. This section aims to provide comprehensive answers to common questions regarding the calibration of XNX gas detectors, a crucial process for ensuring the safety and accuracy of these devices in detecting various gases.
1. What is an XNX Gas Detector?
Answer: The XNX Gas Detector Calibration is a flexible and robust gas detector compatible with a variety of gas sensing technologies. It is designed to function in a wide range of industrial environments, providing reliable detection of hazardous gases.
2. Why is Calibration of XNX Gas Detectors Important?
Answer: Calibration is vital to ensure that the XNX Gas Detector Calibration is providing accurate and reliable readings. Regular calibration checks help in maintaining the detector’s sensitivity to the specific gases it is designed to detect and ensures it operates within the specified safety standards.
3. How Often Should XNX Gas Detectors be Calibrated?
Answer: The frequency of calibration depends on several factors, including the type of gas being detected, the environment in which the detector is used, and the manufacturer’s recommendations. Generally, it is advised to calibrate these detectors at least once every six months.
4. What are the Steps Involved in Calibrating an XNX Gas Detector?
Answer: The basic steps for calibrating an XNX Gas Detector Calibration typically include:
- Zero calibration: Ensuring the detector reads zero in a clean air environment.
- Span calibration: Exposing the detector to a known concentration of test gas to adjust the reading to match the concentration.
- Recording the calibration data for future reference.
5. Can I Calibrate an XNX Gas Detector Myself?
Answer: Yes, users can perform calibration themselves provided they have the necessary skills and calibration gases. However, it is often recommended to have calibration done by a trained professional, especially for complex applications.
6. What Equipment is Needed for Calibration?
Answer: You will need XNX Gas Detector Calibration (specific to the gas type the detector is designed to sense), a gas regulator, calibration adapter, and tubing. Ensure that the calibration gas concentration is appropriate for the type of sensor being calibrated.
7. What are the Common Issues During Calibration?
Answer: Common issues include incorrect calibration gas concentration, environmental factors affecting the sensor (like temperature and humidity), and sensor degradation over time. Regular maintenance and following manufacturer guidelines can mitigate these issues.
8. How Do I Know if My XNX Gas Detector Needs Recalibration?
Answer: Indicators include inconsistent or inaccurate readings, failure to respond to gas exposure, or an alert from the detector’s internal diagnostics. Regular scheduled calibrations are recommended to avoid these issues.
9. Is There a Difference in Calibration Process for Different Gases?
Answer: Yes, different gases may require different concentrations of calibration gas and potentially different calibration adapters. Always refer to the manufacturer’s guidelines for specific calibration procedures for different gases.
10. Where Can I Find the Calibration Guidelines for My Specific XNX Gas Detector Model?
Answer: Calibration guidelines are typically found in the user manual provided with the detector. You can also contact the manufacturer or visit their website for specific instructions related to your model.


